

Important installation notice: Installation may vary depending on the vehicle model, dashboard type, connector type, and product configuration. This page explains the general installation process only.
The most difficult part is usually not connecting the device itself, but carefully accessing the instrument cluster or dashboard connector without damaging trim parts. If you are not sure how to remove the panel on your vehicle, we recommend contacting a qualified specialist or asking our support team before installation.
Before Installation
Before installing the device, make sure you have the correct product for your vehicle and that you have checked all important product notes. Some vehicles may have different dashboard types, connector versions, or installation details even within the same model generation.
Before you begin, we recommend that you:
- check the product page and compatibility information;
- prepare a clean and safe workspace;
- turn off the vehicle before working near the instrument cluster;
- use proper trim removal tools where needed;
- avoid pulling trim parts, connectors, or cables with excessive force;
- keep all removed screws, clips, and trim parts in a safe place;
- contact our support team if the connector, dashboard type, or installation point is unclear.
How Installation Usually Works
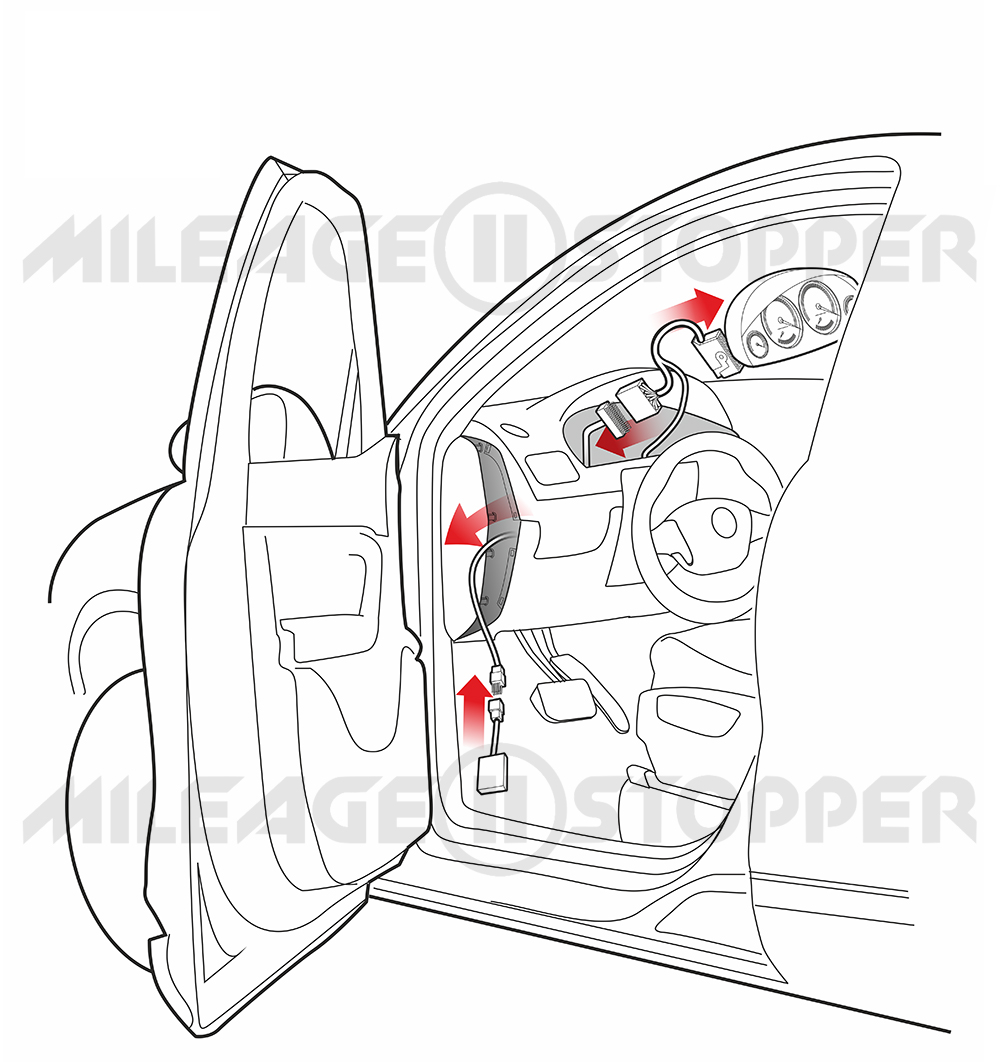
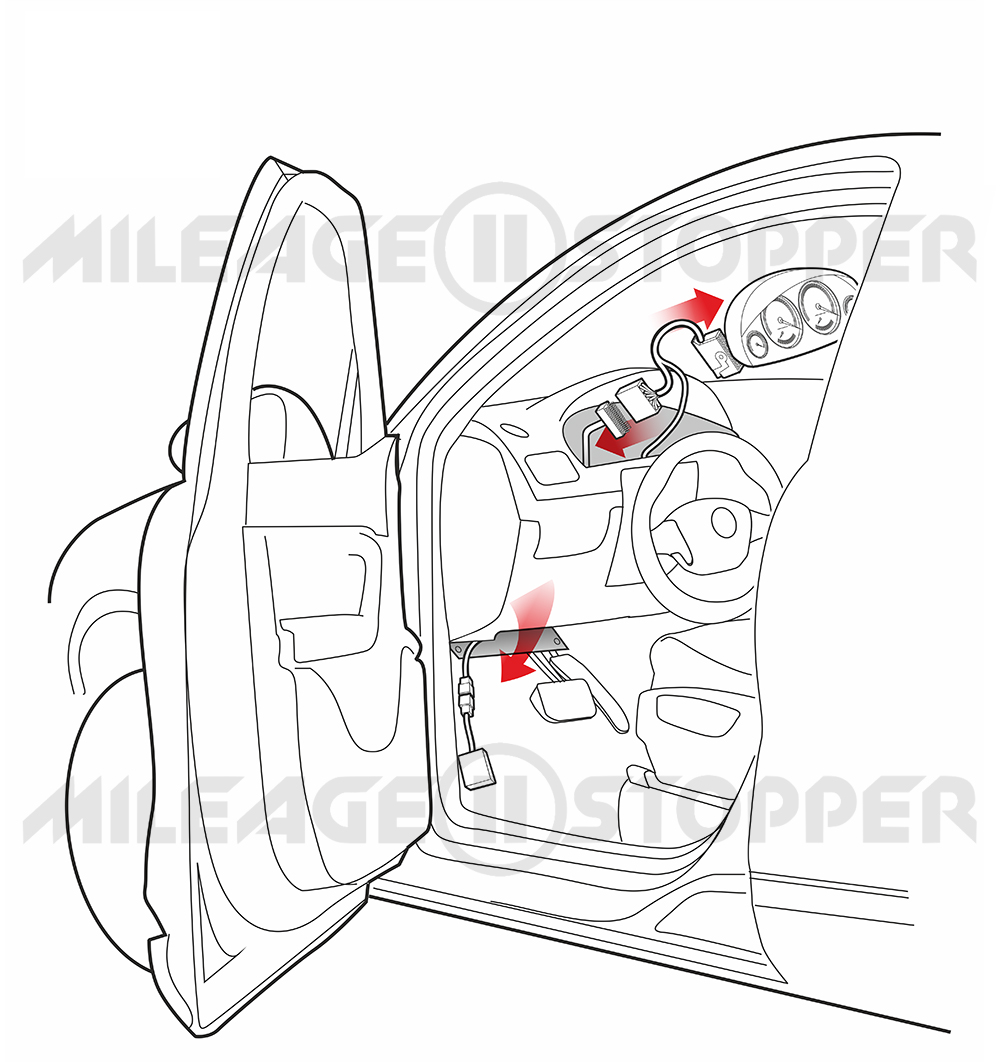
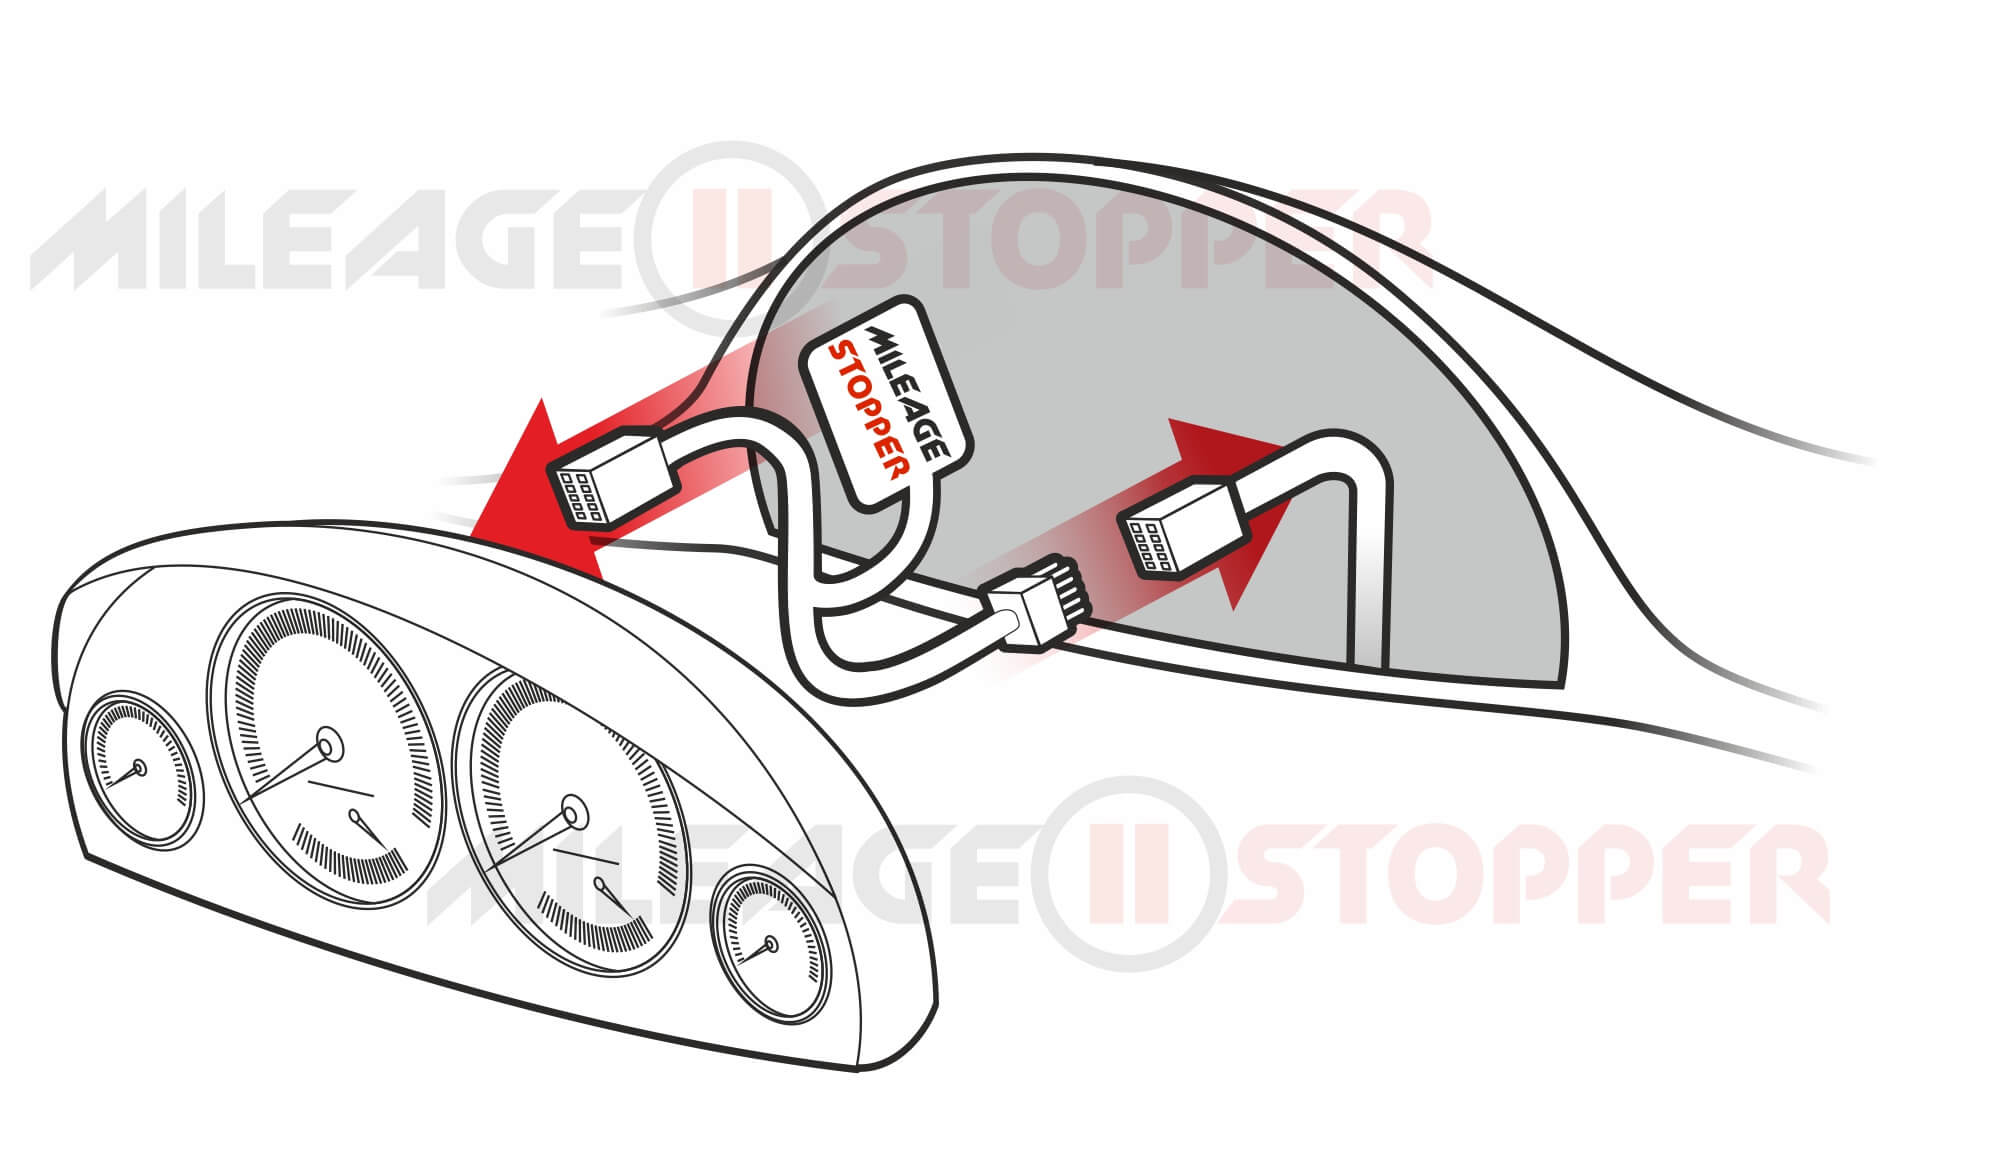
Most M-Stopper devices are designed for plug-and-play installation. In a typical installation, the device is connected between the vehicle's original wiring connector and the instrument cluster or dashboard module.
The general process usually looks like this:
- Access the instrument cluster: carefully remove the necessary trim parts or dashboard elements to reach the original connector.
- Disconnect the original connector: unplug the factory connector from the instrument cluster or dashboard module.
- Connect the device: connect the M-Stopper device between the original vehicle connector and the instrument cluster.
- Check the connection: make sure the connectors are fully seated and the wiring is not stretched, twisted, or pressed by trim parts.
- Test the device: turn the vehicle on and check that the instrument cluster works correctly.
- Reinstall trim parts: after checking operation, carefully reinstall the instrument cluster and removed trim parts.
The exact steps may be different for your vehicle. Some models may require additional notes, photos, video instructions, or support from our team.
General Connection Example
The pictures below show common examples of how the device is connected behind the instrument cluster. The exact connector type and dashboard layout may vary depending on the vehicle model.
Vehicle-Specific Instructions
Different vehicles may have different dashboard layouts, connector locations, trim clips, and installation details. For this reason, one universal instruction cannot fully replace a model-specific guide.
For supported vehicles, we may provide additional installation guidance, photos, videos, or step-by-step notes when needed. If you are not sure which connector to use or how to access the dashboard, contact us before continuing.
We are also working on a more detailed instruction library with vehicle-specific guides, photos, videos, setup notes, and support materials for supported models.
Dashboard Installation Area
In most cases, the device is installed behind or near the instrument cluster. Accessing this area carefully is usually the most important part of installation.
Video Instructions
You can find video instructions and helpful installation materials on our YouTube channel:
Watch M-Stopper installation videos on YouTube
Please note that a video may show a similar vehicle, connector, or dashboard type, but your exact vehicle configuration may still be different. If something does not match your vehicle, contact our support team before continuing installation.
Connector Orientation and First Check
On some vehicles, connector orientation and plug position are important. If the instrument cluster does not turn on, the device does not respond, or something does not work as expected, do not force the connector and do not continue blindly.
Disconnect the device, check the connector position, compare it with the instruction for your vehicle if available, and contact our support team if you are unsure.
Troubleshooting
If something does not work as expected after installation, the issue is often related to connector position, incomplete connection, wrong product selection, dashboard type mismatch, or missing vehicle-specific setup notes.
Common situations may include:
- the instrument cluster does not turn on;
- the device does not respond;
- warning messages appear on the dashboard;
- the selected mode does not work as expected;
- the connector or dashboard type does not match the instruction;
- you are not sure how to complete installation safely.
If any of these situations happen, stop installation and contact our support team. Please include your order number, vehicle make, model, year, dashboard photos, connector photos, and a short description of the issue.
Important Safety Notes
Do not cut wires, solder, modify connectors, or make permanent changes unless this is specifically required by the product instructions for your vehicle and you fully understand the procedure.
If you are not experienced with vehicle electronics or dashboard disassembly, we recommend asking a qualified specialist to perform the installation.
The customer is responsible for ensuring that installation and product use comply with local laws, vehicle rules, road regulations, inspection requirements, and any other applicable regulations in their country or region.
Need Help With Installation?
For installation questions, vehicle-specific guidance, order questions, or customer support, you can contact us through our official communication channels: